WordPress
Install the Selgeo tracking snippet on a WordPress site. The snippet must run on every page of your site — visitors can arrive at any URL with a ?ref=… parameter, and a snippet that runs only on a single post or landing page will miss most clicks.
API Version: v1
If you are not on WordPress, see the HTML / plain-script guide, the Next.js guide, or the React (Vite) guide instead.
A page-scoped Gutenberg Custom HTML block dropped on a single post or landing page is not acceptable. The ?ref= parameter can land on any URL of your site — your home page, your pricing page, a blog post a partner shared. If the snippet is not present site-wide, those clicks are silently lost. Use one of the three site-wide placement paths below.
Three site-wide placement paths
| Path | Best for | Editing |
|---|---|---|
| A. Site Editor (block themes) | Modern block themes (Twenty Twenty-Three, Twenty Twenty-Four, Twenty Twenty-Five, etc.) | No code; uses the WordPress Site Editor |
B. footer.php (classic themes) | Classic themes with footer.php (Astra, GeneratePress, OceanWP without FSE, custom themes) | Direct theme file edit |
| C. Header-footer plugin | Any WordPress site, including those without theme-file access | No code; plugin UI |
Use whichever path matches your stack. All three result in the same snippet running on every page.
Path A — Site Editor (block themes)
For block themes (Full Site Editing — FSE).
Step 1: Open the Site Editor
In the WordPress admin, navigate to Appearance > Editor. The Site Editor opens.
Step 2: Open the footer (or header) template part
In the left navigation, select Patterns > Template Parts > Footer (or Header). The Footer template part is the standard host for tracking snippets because it loads on every page.
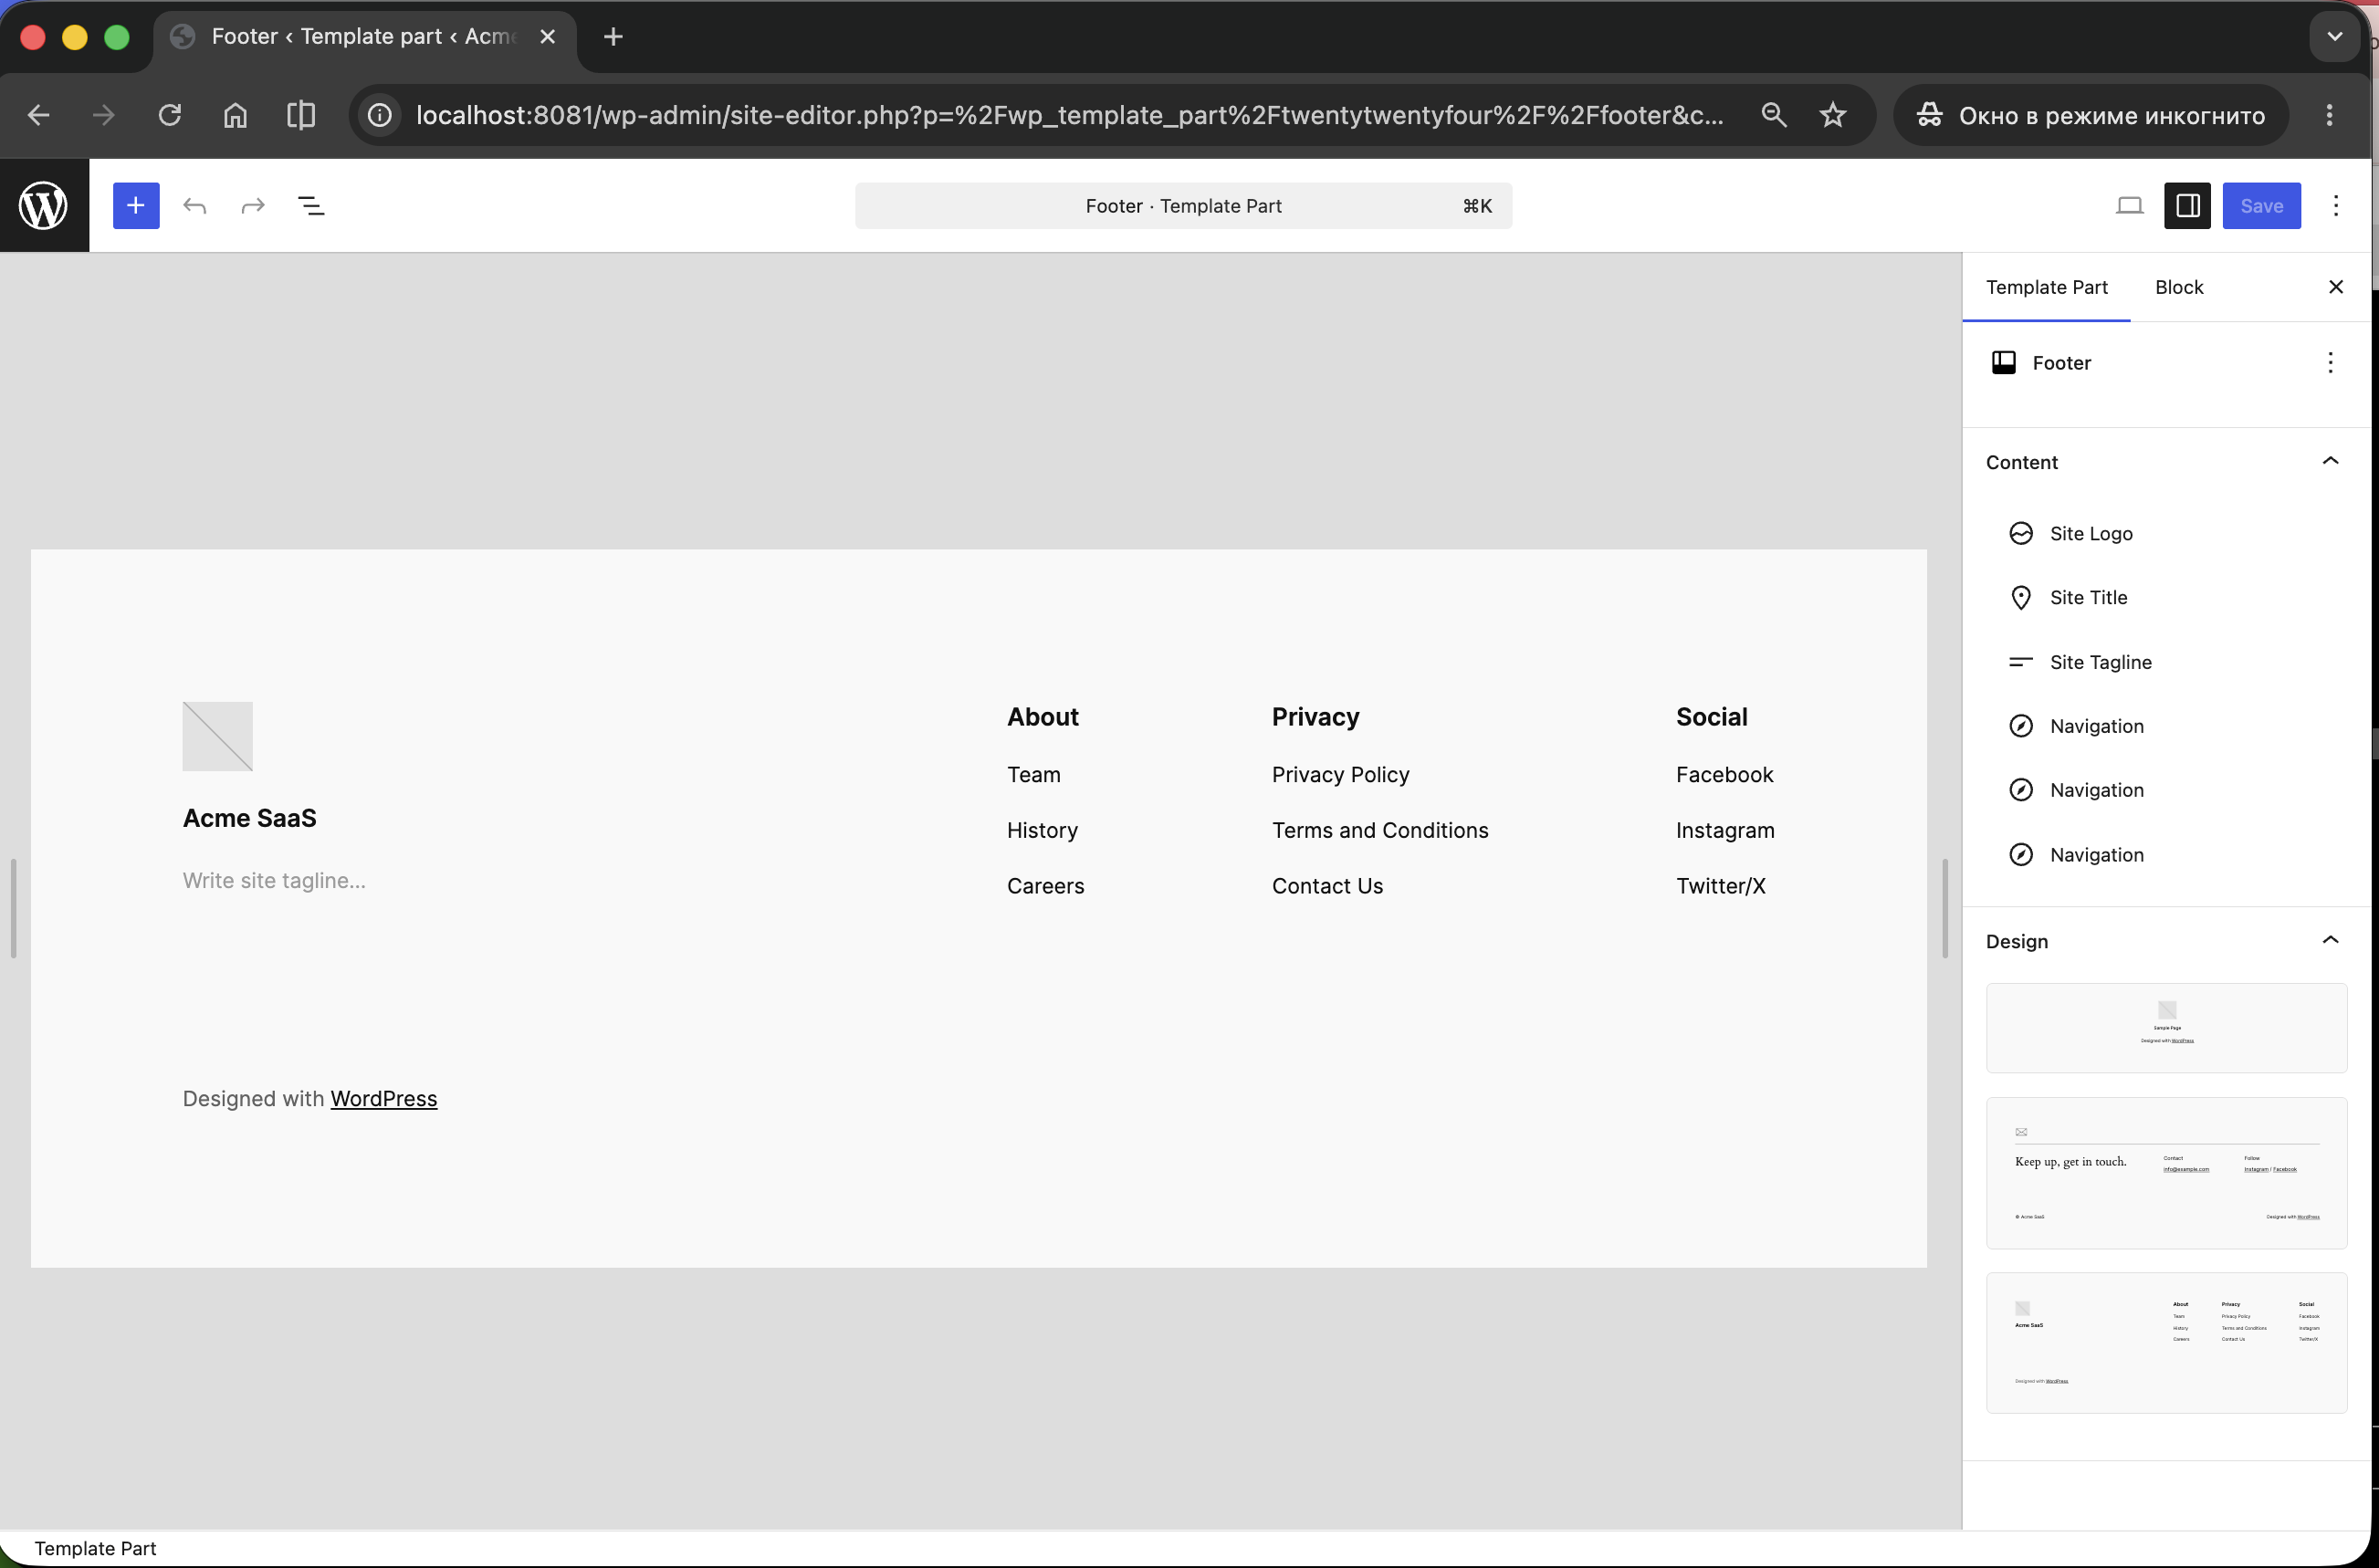
Step 3: Insert a Custom HTML block
Click the + add-block button at the end of the footer, search for Custom HTML, and insert the block.
Paste the snippet into the block body:
<script
  async
  src="https://cdn.selgeo.com/v1/selgeo.js"
  data-merchant="pk_test_YOUR_KEY"
></script>
Replace pk_test_YOUR_KEY with your public API key from Settings > API Keys in the Selgeo dashboard.
Step 4: Save the template part
Click Save at the top right. WordPress applies the change site-wide immediately.
Either works. The footer is preferred because it does not block first paint. A header placement is fine if your footer is conditionally hidden (rare).
Path B — footer.php (classic themes)
For classic (non-FSE) themes.
Editing the parent theme's footer.php directly means your edit is overwritten on the next theme update. Either use a child theme or one of the other two paths.
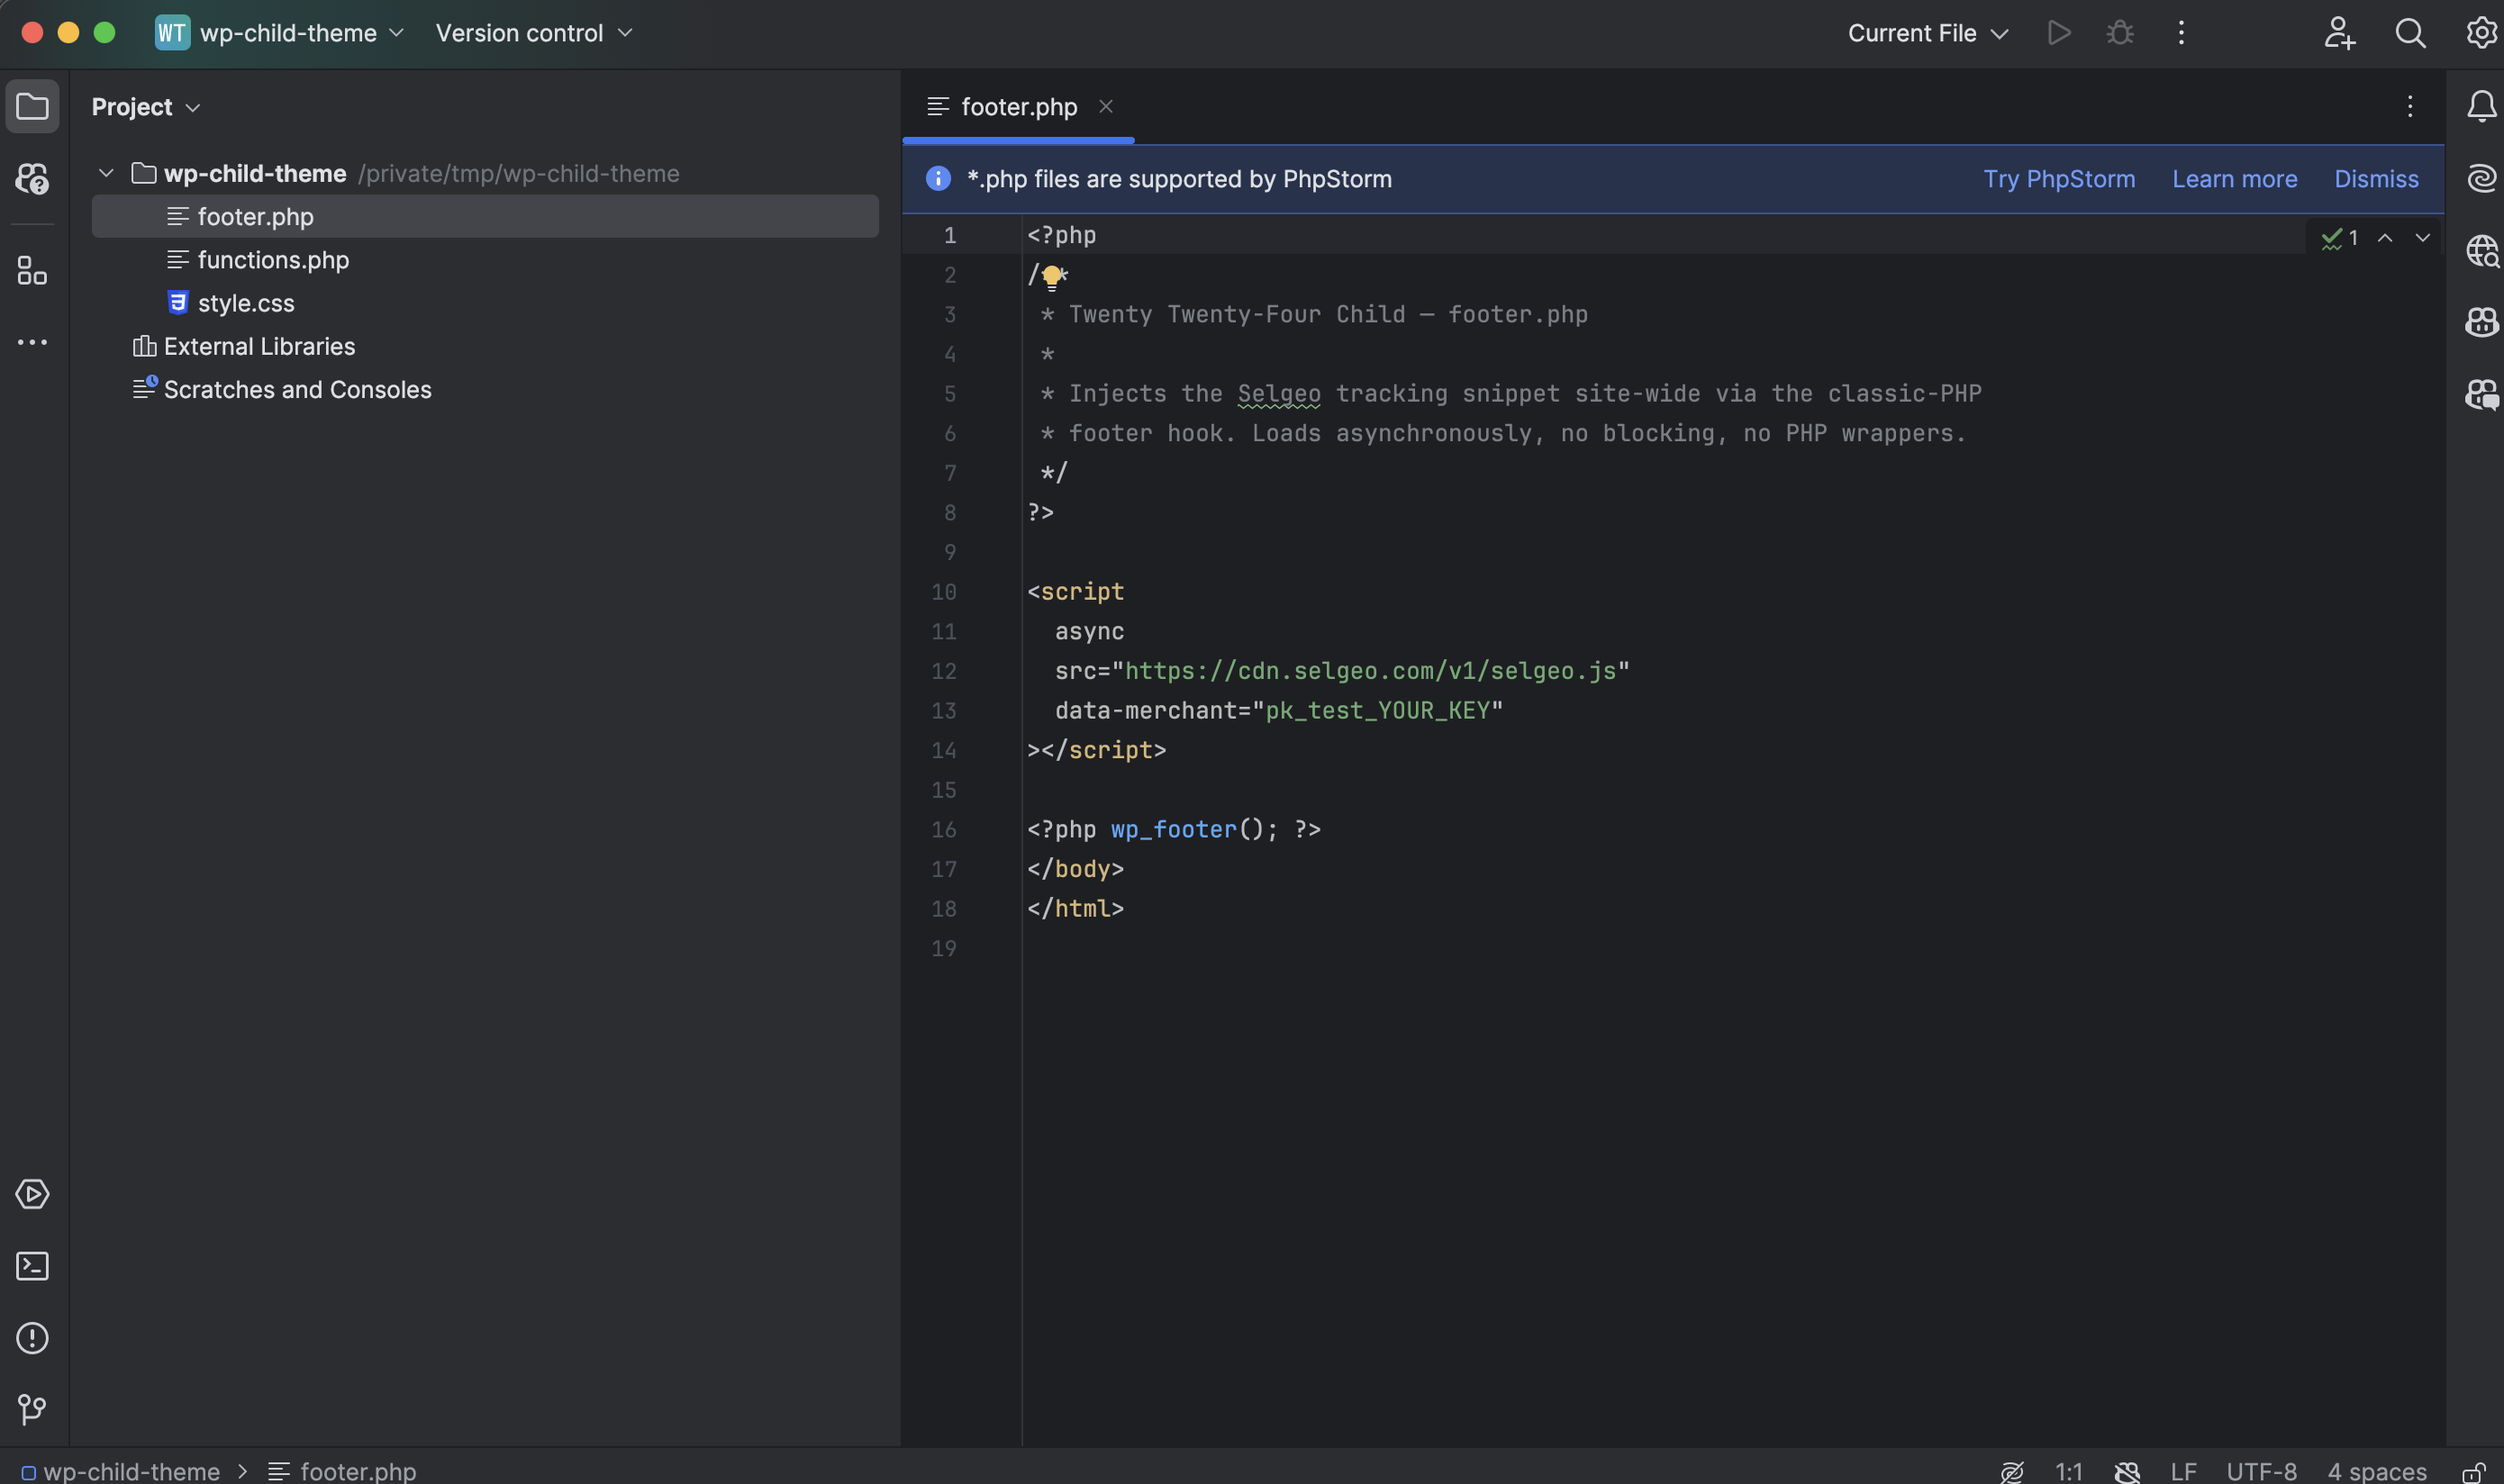
Step 1: Open your child theme's footer.php
Path: wp-content/themes/<your-child-theme>/footer.php.
If the file does not exist in your child theme, copy it from the parent theme first.
Step 2: Add the snippet just before </body>
<?php
// ... your existing footer markup ...
?>

<script
  async
  src="https://cdn.selgeo.com/v1/selgeo.js"
  data-merchant="pk_test_YOUR_KEY"
></script>

<?php wp_footer(); ?>
</body>
</html>
Place the <script> tag before wp_footer() so the snippet loads early enough to capture clicks, but inside the same closing </body> block.
Step 3: Upload and verify
Upload the edited footer.php to your server (via SFTP, the WordPress file editor, or your hosting panel's file manager) and reload your site.
Path C — Header-footer plugin
For sites without theme-file access, or operators who prefer a UI.
The two most popular plugins are:
- WPCode (formerly Insert Headers and Footers) — free tier covers this use case.
- Insert Headers and Footers by WPBeginner — minimal, single-purpose plugin.
The instructions are essentially identical; this section uses WPCode as the example.
Step 1: Install and activate the plugin
In the WordPress admin, navigate to Plugins > Add New, search for WPCode, install, and activate.
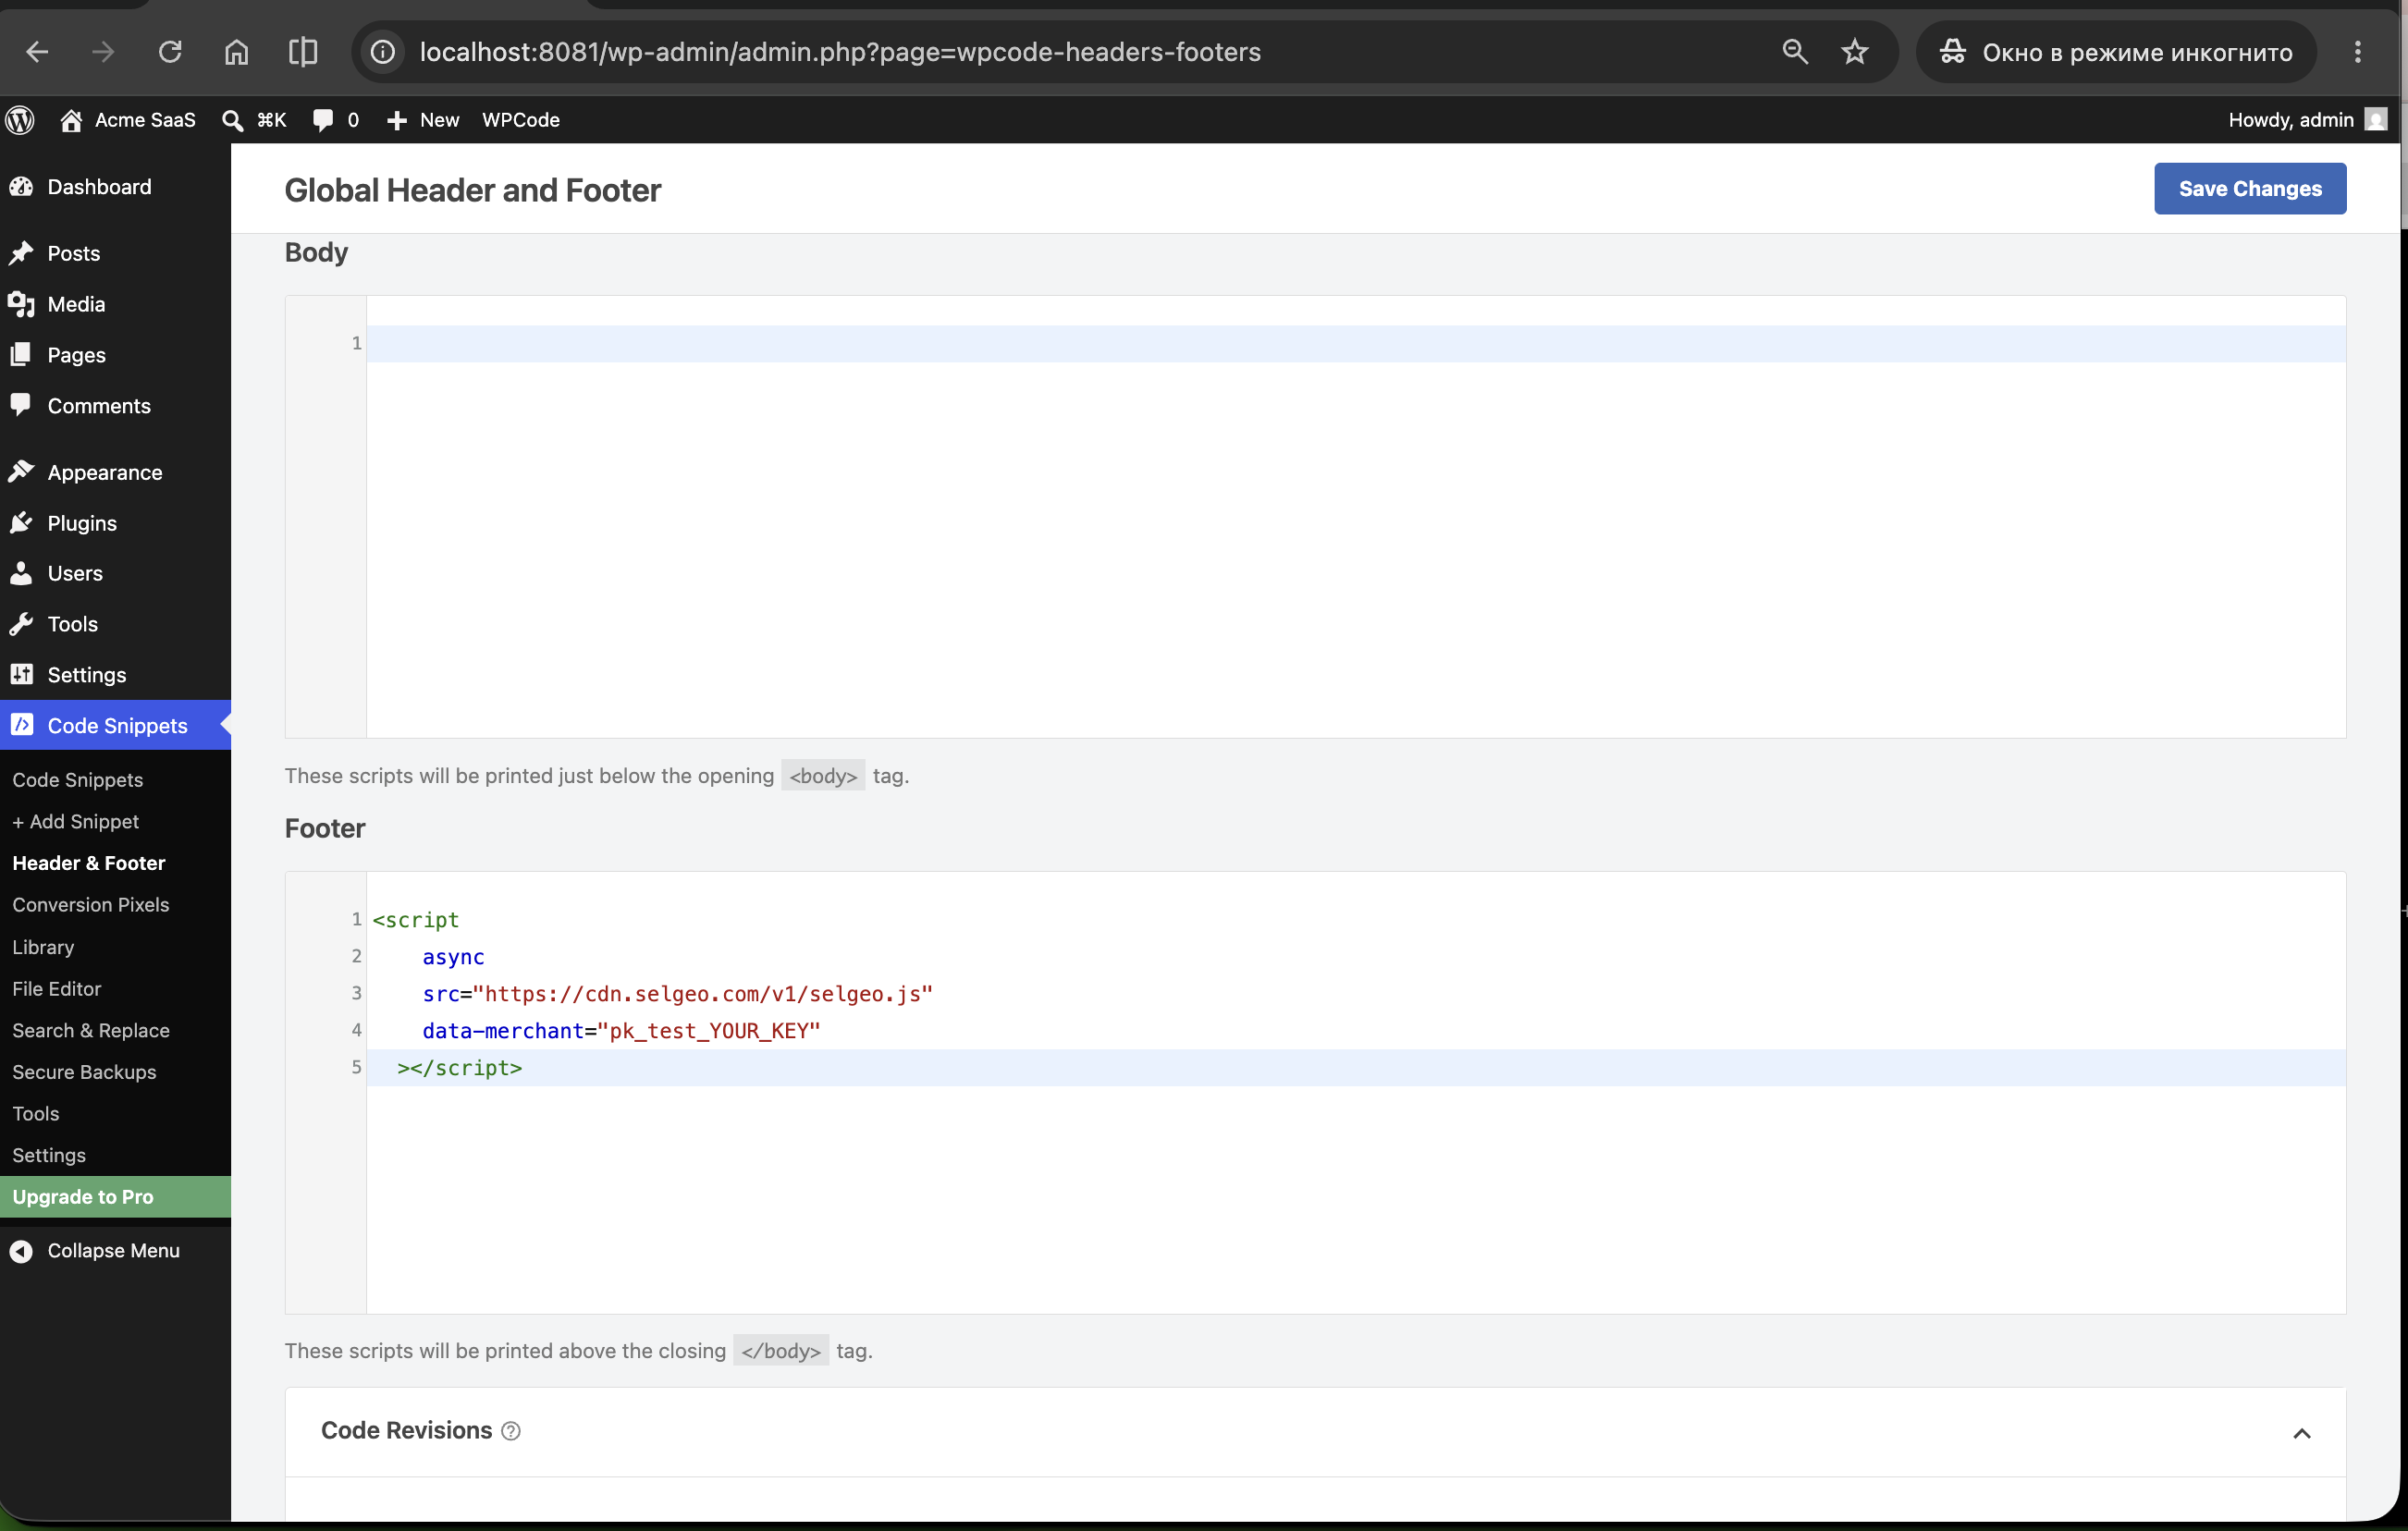
Step 2: Open the Header & Footer settings
Navigate to Code Snippets > Header & Footer.
Step 3: Paste the snippet in the Footer area
In the Footer text area, paste:
<script
  async
  src="https://cdn.selgeo.com/v1/selgeo.js"
  data-merchant="pk_test_YOUR_KEY"
></script>
Replace pk_test_YOUR_KEY with your public API key.
Step 4: Save changes
Click Save Changes. The plugin injects the snippet site-wide on the next page load.
Verifying your installation
- Open your site in a private / incognito browser window.
- Get a referral link. Tracking links are created by partners in the partner portal (under Links), not in the merchant dashboard. For a quick self-test, sign in to the partner portal as a test partner and create one, or ask an existing partner for their link.
- Visit your site with the tracking link, for example:
https://your-site.com/?ref=YOUR_TEST_REF
- Open Developer Tools (F12). In the Elements tab, search for
selgeo.js— it should appear inside<body>or just before</body>. - With
data-debugadded temporarily, the Console will show:[selgeo] ref detected YOUR_TEST_REF[selgeo] click_id stored xxxxxxxx-xxxx-xxxx-xxxx-xxxxxxxxxxxx - Run in the console:
This should return a UUID string.__selgeo.getClickId()
- Open the Selgeo dashboard. The click should appear under Analytics within a few seconds.
Troubleshooting
Snippet not loaded
- Open the rendered page source (right-click > View Page Source) and search for
selgeo.js. The<script>tag must appear in the HTML — if it does not, the snippet did not reach the page. - For Path A (Site Editor): confirm you saved the template part, not just a single page. The template part icon in the Site Editor is a small "puzzle piece" — saving a page will not propagate.
- For Path B (
footer.php): confirm you uploaded to the child theme, that the child theme is active under Appearance > Themes, and that no caching plugin is serving a stale copy. Purge cache after editing. - For Path C (plugin): ensure the plugin is active (not just installed) under Plugins, and that the snippet was pasted into the Footer area, not a per-page custom field.
- Page-builder plugins (Elementor, Divi, Beaver Builder) sometimes strip raw
<script>tags from their own editor. If you placed the snippet via a page-builder block, switch to one of Paths A / B / C instead — those operate at the WordPress template layer and survive page-builder rendering.
Click not tracked
- The visitor must arrive with
?ref=…on the initial page load. Reloads strip the parameter (the snippet rewrites the URL on capture). - Verify
data-merchantcontains a validpk_test_*orpk_live_*key. A missing key produces a silent no-op. - Check whether a caching plugin (WP Rocket, W3 Total Cache, LiteSpeed) is rewriting
<script>tags. Most caching plugins offer an option to exclude scripts from "JS optimisation" / "defer / combine" — excludeselgeo.jsfrom those rules. - Verify the snippet runs site-wide, not just on one page (open the home page and any other page, view-source, confirm the tag is there both times).
CSP blocking
If your hosting provider or a security plugin (e.g., Wordfence, Sucuri) injects a Content-Security-Policy header, allow the Selgeo origins:
script-src 'self' https://cdn.selgeo.com;
connect-src 'self' https://app.selgeo.com;
For staging / dev workspaces where data-api-url points elsewhere, add that origin to connect-src as well.
Next steps
- Stripe Payment Links — zero-backend Stripe integration; pairs especially well with WordPress sites that link out to
buy.stripe.com. - Conversion API — track non-Stripe conversions (form submissions, plugin webhooks).
- Snippet Setup — full attribute reference and the underlying HTML script tag.